While it is commonly known that building insulation is a critical component to achieveing optimal energy efficiency in homes and buildings, many people don’t realize that the insulation installation is almost as important as the insulation itself. Poor installation practices can lead to a host of performance problems, ranging from not meeting energy efficiency requirements to creating the potential for vapor drive that leads to condensation. Beyond that, there is an international push to drastically improve energy efficiency in our homes and buildings, and this push relies on correctly installed insulation as one of the critical lynchpins to success.
As a result, the industry has developed a standard grading method for insulation installation practices, with Grade I Installations being the best and Grade III Installations being the worst. In many cases, anything less than a Grade I installation will not be sufficient to meet energy efficiency requirements set by Energy Star, DOE Zero Energy Ready Homes, utility incentive programs, and Home Energy Rating System (HERS) index. Additionally, anything less than a Grade I installation wastes money for the contractor and the building owner.
With that in mind, it’s important to understand exactly what differentiates a Grade I installation from the other grades, and what installers, inspectors, and homeowners should know about meeting Grade I installations.
The installation grading system is set by RESNET, the Residential Energy Services Network. The score depends on how well the installation meets the insulation manufacturer’s installation instructions. It also covers all types of insulation, including fiberglass, spray polyurethane foam (spray foam) , mineral wool, and cellulose.
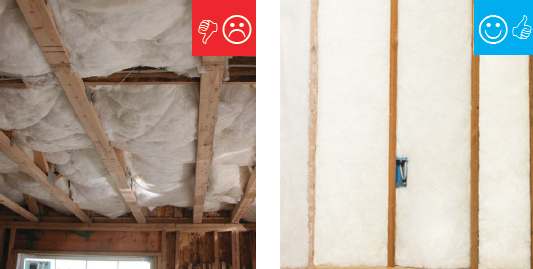
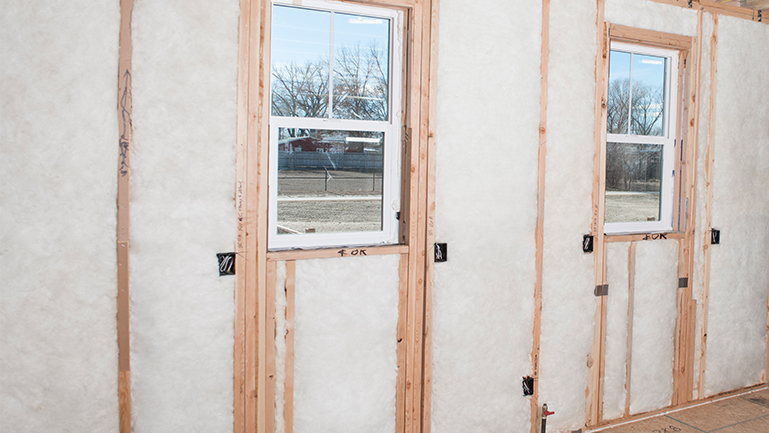
A Grade I installation requires the material to uniformly fill each cavity completely, from side to side and top to bottom. There cannot be any gaps or voids around obstructions (such as blocking or bridging) or around wiring and other services in the cavity. This type of installation will not only improve energy efficiency, but it will also prevent callbacks for the contractor and code officials. A Grade I insulation calculates that 100% of the area to be insulated has been filled. Bear in mind, that in some cases and depending on the type of insulation being used, the area to be insulated may not include the entire depth of the wall cavity, though it would still include all four sides and the top and bottom.
For example, if the application requires an R-13, installers could achieve this R-value with 2 inches of closed-cell JM Corbond® III or JM Corbond® IV spray foam. Installers would need to ensure that the cavity was uniformly filled on all sides with 2 inches of insulation; however, they would not need to fill the entire depth of the cavity (3.5 inches) with insulation to achieve the required
R-value.

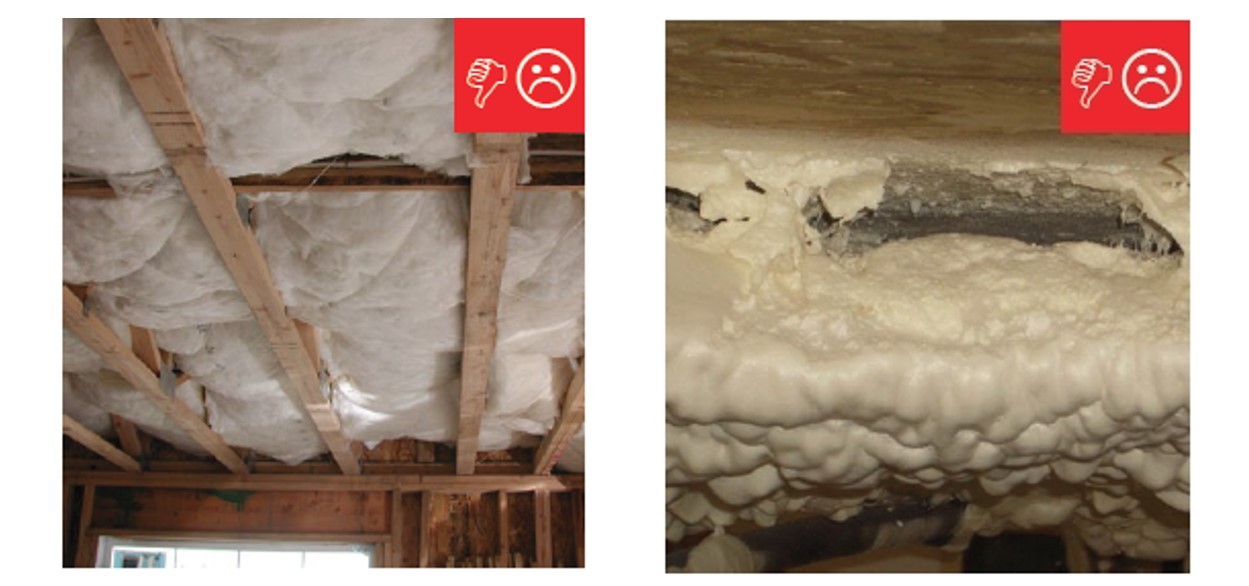
The second-best type of installation is a Grade II installation. In Grade II installations, there is some allowance for imperfections, such as gaps around intrusions or an incomplete fill. A Grade II installation identifies that 98% of the area to be insulated has been filled to the required R-value and that 2% of the area remains uninsulated.
Grade III installations are the lowest grade, and they are described as having “substantial gaps and voids.” In this type of installation, 95% of the area to be insulated is considered filled, while 5% of the area remains uninsulated. This does not mean that the installation delivers 95% of the intended R-value, but rather that only 95% of the area that should be insulated has been insulated. The remaining 5% of the area may have some insulation or no insulation at all, but it has not been sufficiently insulated to the proper R-value.

The visual difference between a Grade I installation and a Grade III installation is apparent, and inspectors who view installations on a daily basis will easily be able to identify one from the other. Learning to deliver a Grade I installation doesn’t benefit just the building owner by ensuring optimized energy efficiency; it also saves the contractor money by ensuring that they won’t be called back to do rework.
That said, it is clear that a Grade I installation requires more technical know-how and a greater emphasis on quality control. If you would like to learn more about how to deliver a Grade I installation, visit NAIMA’s Grade I installation page, or you can contact JM’s TechConnectSM Team to speak with someone directly.

