There are a lot of questions that surround choosing and installing insulation. At Johns Manville, we want to help make those processes as easy as possible. So, when our customers have questions, we’re here to offer answers. Here’s a question we received recently from a JM customer:
“I’ve heard ComfortTherm is a good option for DIY installers. What is the best way to install ComfortTherm® Fiberglass Insulation? How should I cut it and do I remove the plastic at some point?”
Fiberglass insulation, in general, is one of America’s most common insulation materials. JM ComfortTherm® Formaldehyde-free™ fiberglass insulation comes wrapped in plastic, helping reduce itch and dust during installation.
So, yes, it’s perfect for homeowners or DIY installers who plan to install the insulation themselves. ComfortTherm® covers all your bases because it’s available in R-values 11-30 and provides your home all-around protection from elements such as fluctuating temperatures, noise, moisture infiltration, and fire. Not to mention, this insulation is Formaldehyde-free and thermally efficient, trapping air to prevent heat transfer.
When installing ComfortTherm®, it’s important to have the right tools and equipment on-hand. For example, a tape measure, a sharp utility knife, a stapling tool, safety glasses or goggles, and a long-sleeved shirt, long pants, and gloves.
Once you have these items, you’re ready to install your insulation. The good news is, ComfortTherm® comes in precut batts for standard-sized wall cavities at some of our retailer locations, so in some cases, you might not need to do any cutting. But for other times, it also comes in rolls that can be cut to fit any size.
After measuring each wall cavity into which you’ll place the insulation, the best way to cut the product is by using a straightedge and a sharp knife for precise, easy cuts. During the process, use the same method for cutting to fit around any obstacles that you may have in your wall such as pipes and electrical wiring. When installing under floors or between joists, you can utilize straps or wires so the insulation stays in place.
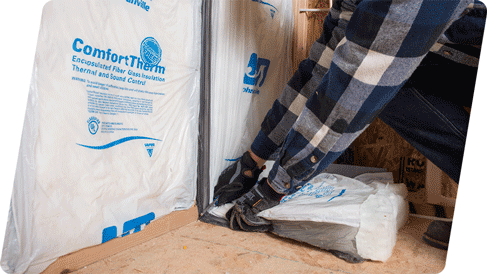
If you’ve purchased ComfortTherm®, you might notice once you open the package that it’s wrapped in plastic. Like all insulation, ComfortTherm® can be placed in the wall as a friction fit. But for ease, or for slightly off-sized cavities, it can also be stapled up by the tabs on the plastic. Once you have it in just leave the plastic in place, it doesn’t affect the performance or R-Value of the insulation, and if purchased with a vapor retarder then this covering acts as your facing.